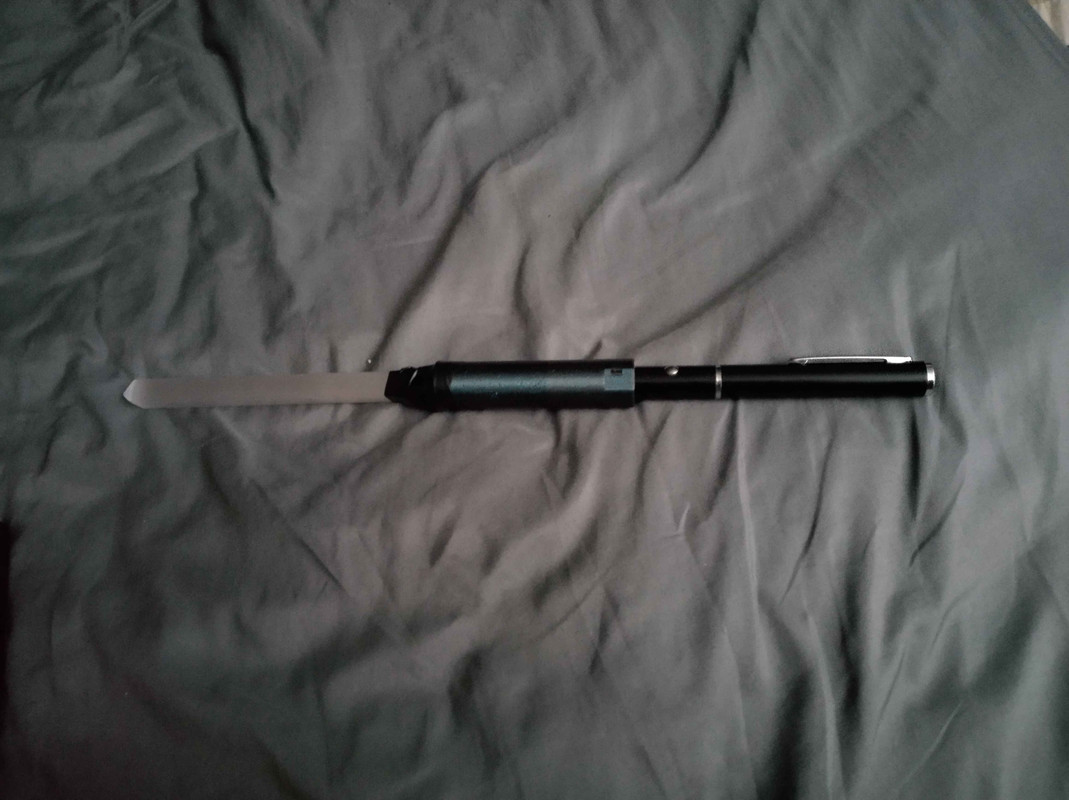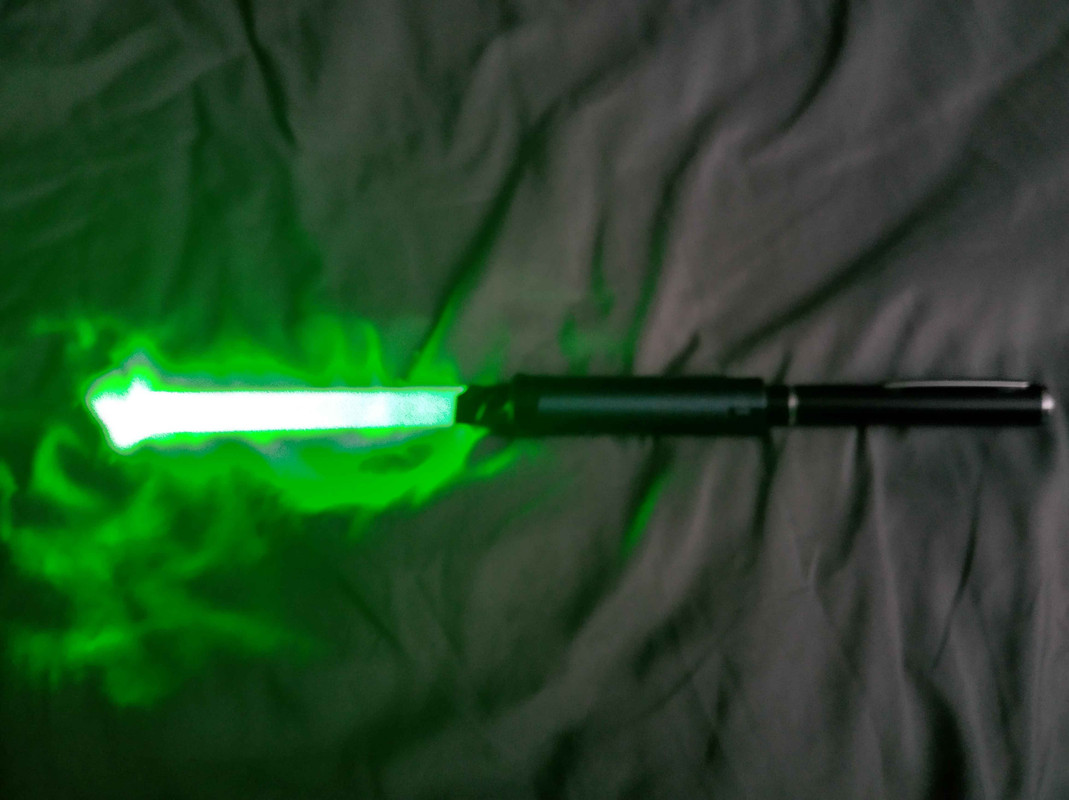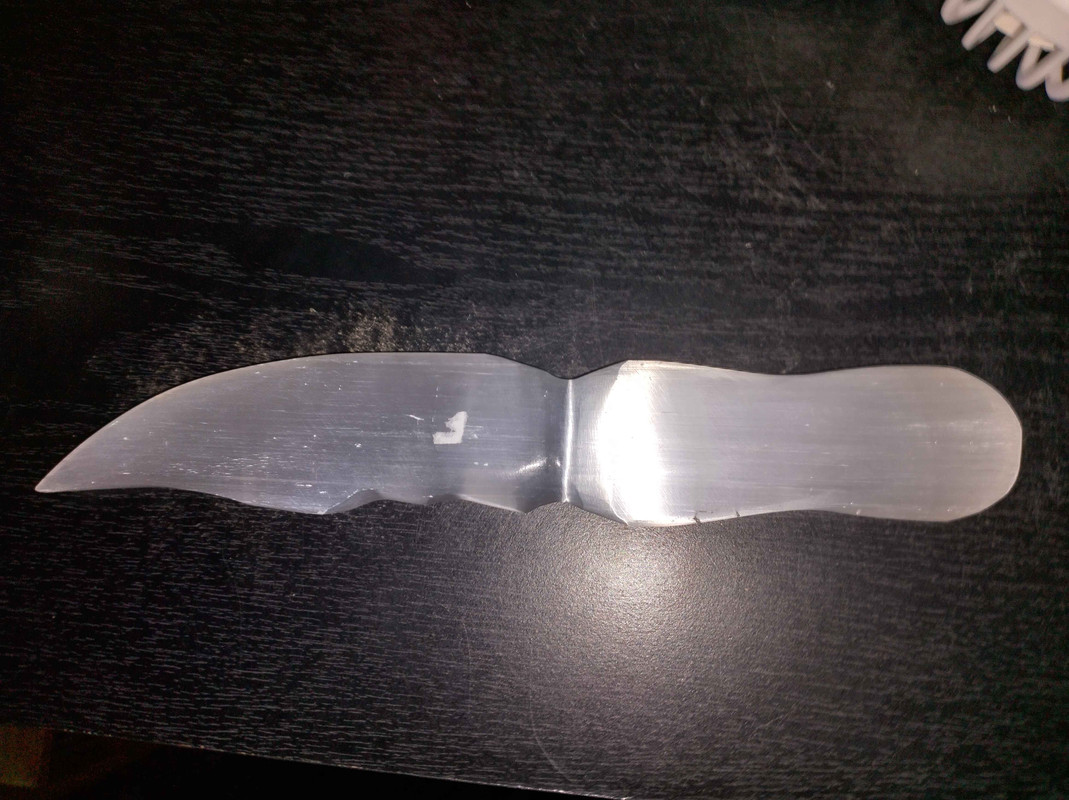
It all started with this. a dagger we got for my brother made from Selenite. nothing too special, but it's not hard to see that it has fiberoptic properties. All it needs is a stand, and a light source.
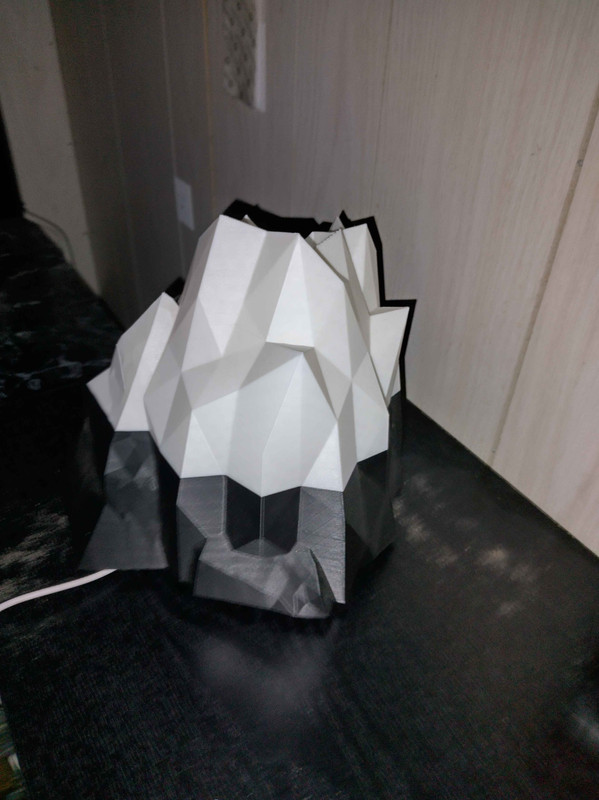
This took longer than it really should have, nearly a year went by before we got the stand prepared for the dagger, and a light mounted in the underside.
it's crude, and I was still learning, just as I am now. but the effect you get, just makes it all worth it.
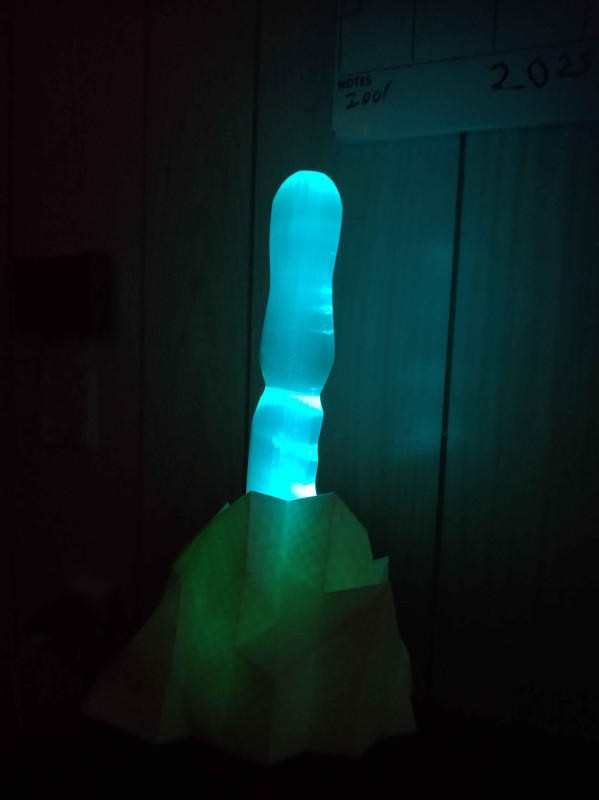
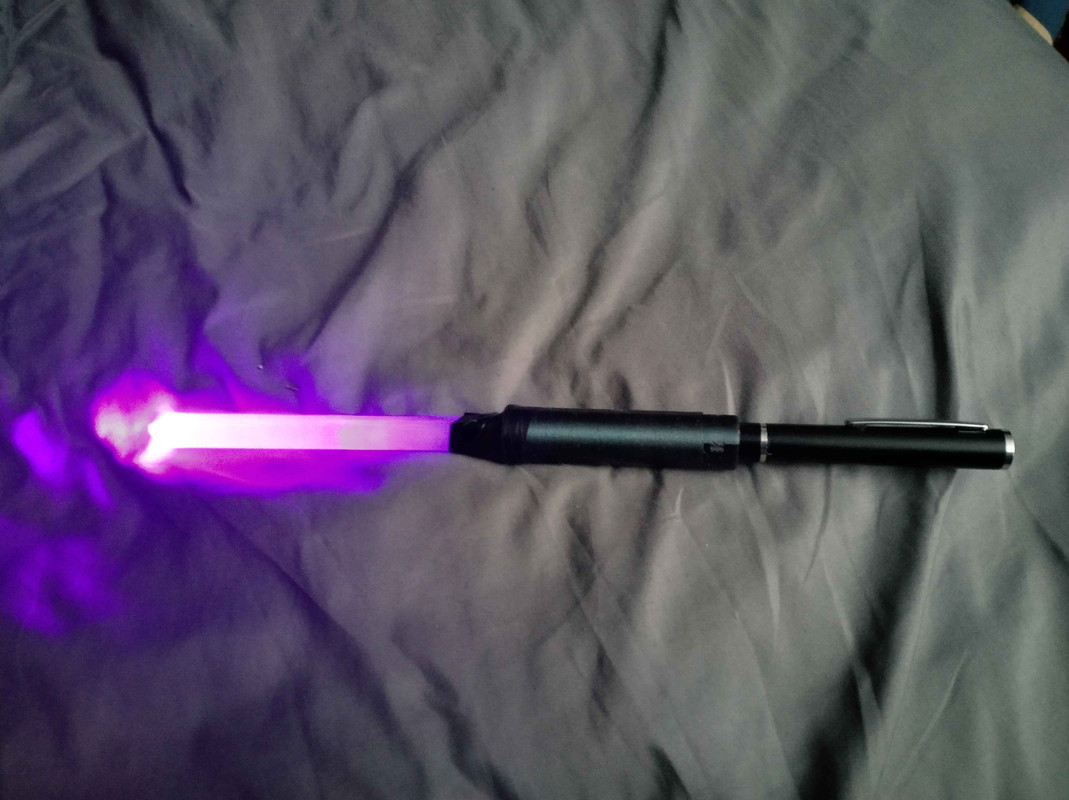
Cut the lights, stick the dagger in the slot, and plug the USB cord into a phone charger. We have, a night light. the diode is all the way at the bottom of this stand, and just shining upwards. this definitely did the trick, and my brother was happy with it. it cycles through the entire spectrum. red, green, blue, cyan, magenta, yellow, and white.
I'm quite proud of this, crude as it is.
So, fast forward to about a week ago. I've learned quite a bit about 3d printing, and, had opted out of joining my family on a camping trip to make sure the house is taken care of.
My family gets back, and I'm handed a balled up newspaper, containing an egg made from selenite, and a wand, also made from selenite... still thinking of what to do with the wand, but...Well I bet you have all already figured out what I planned to do with the egg, if not, you'll see in just a moment.
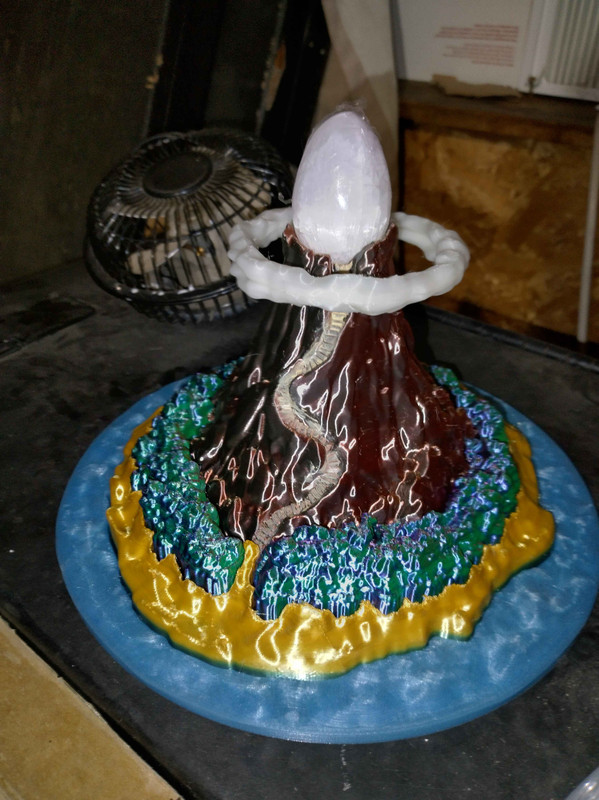
This was a bit of a challenge, utilizing whatever I had for filament on hand, after a marathon run of prints to get my inventory up for a christmas bazar in december.
I downloaded this model from https://www.myminifactory.com/object/3d-print-koholint-island-86281 and gave it a quick inspection. I knew the dimensions on my egg were different, so I did a quick measure with some calipers, and applied the new dimensions to the egg supplied with this model. this gave me the offset percentages to apply to everything to make my egg work.
in this case, X101.83% Y101.83% Z129.72% (Meaning it is actually quite stretched on the vertical axis.) I simply had to apply all this to every piece of the model.
One other adjustment was made...I decided I didn't like the flat bottom on that cloud, so after the scale was made permanent, I took the cloud, reduced it's vertical size by 50% then made a mirror copy. glue those together, and, no more flat bottom on the cloud.
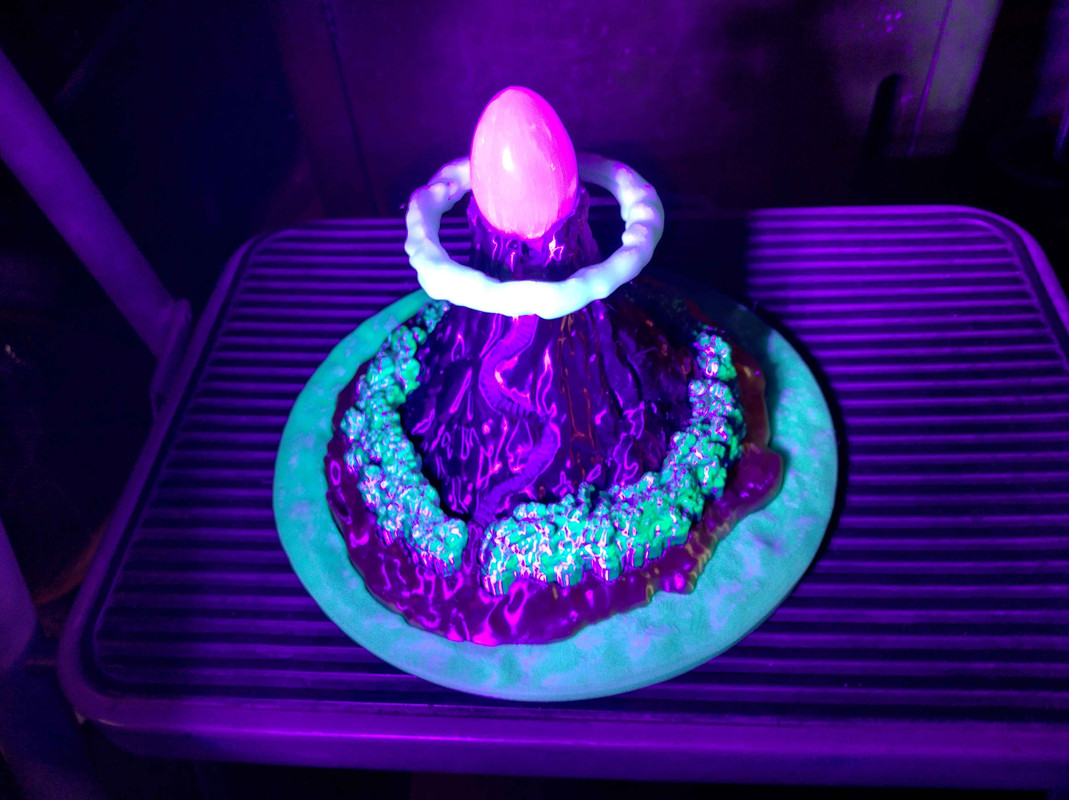
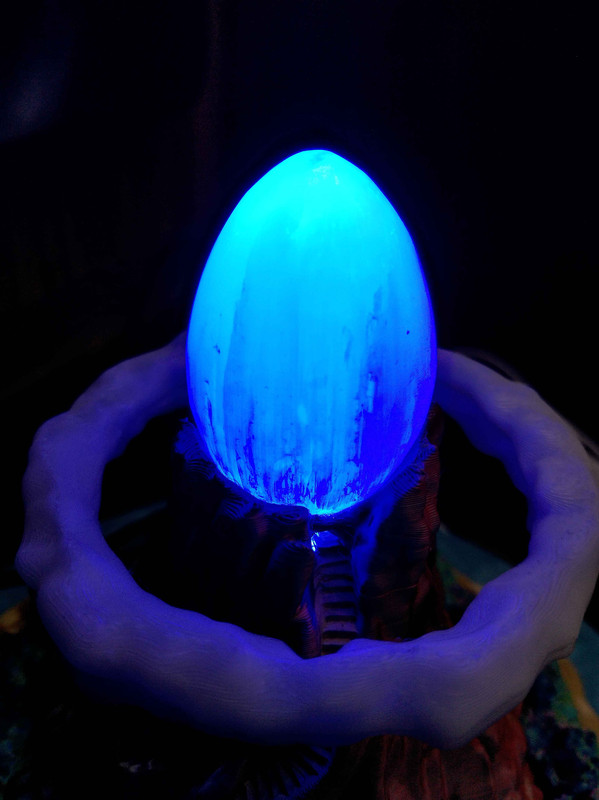
I was charging up the glow in the dark parts with a UV curing light when I got this picture. I didn't expect the trees to light up like this. looks pretty dang cool I think.
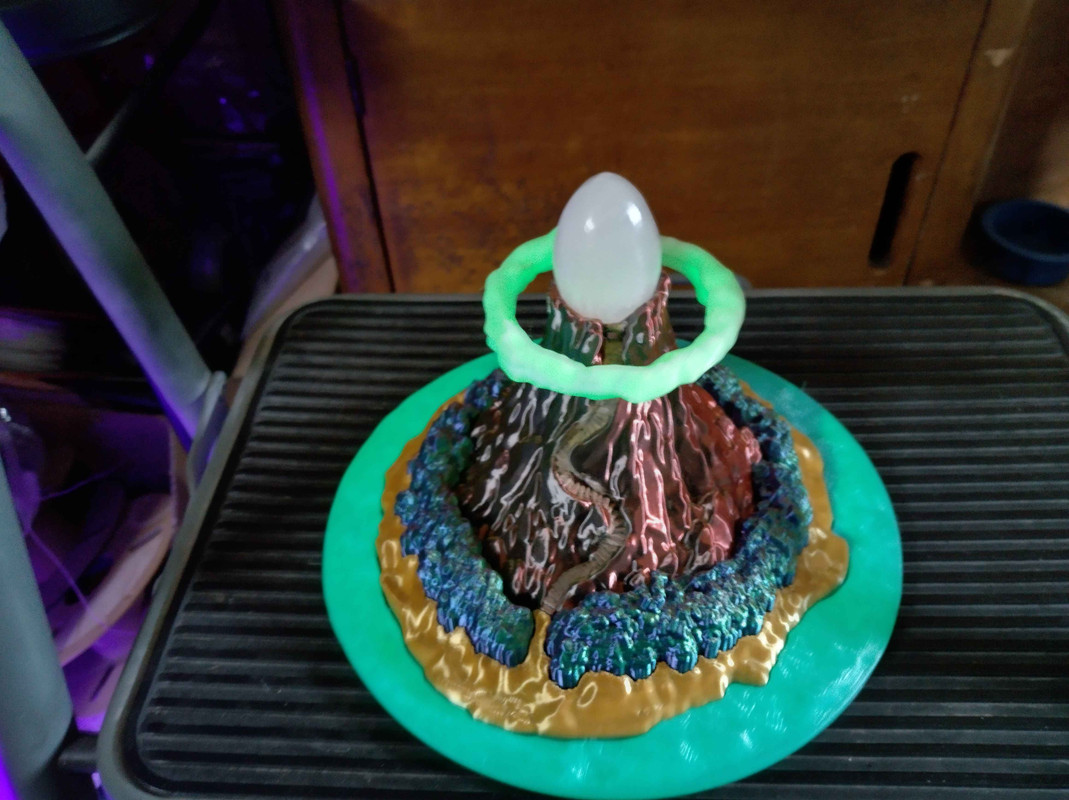
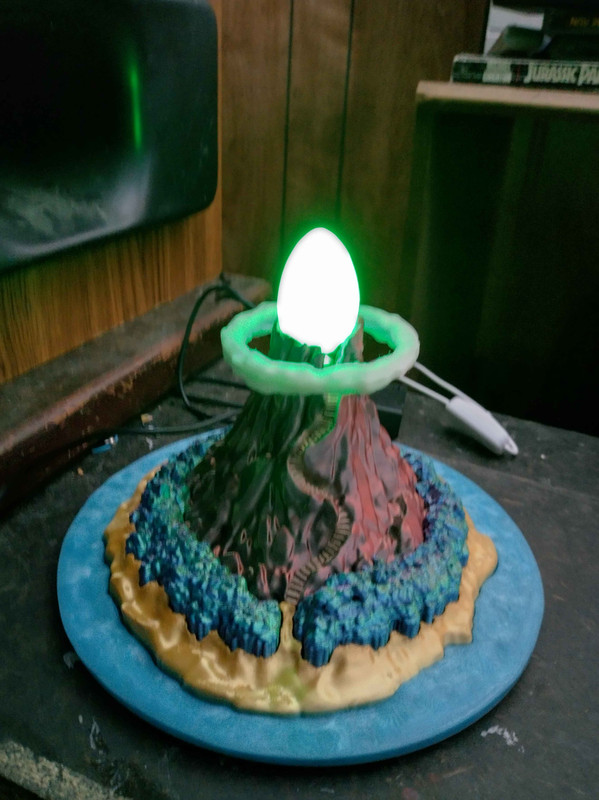
And finally, in low light with the glow parts charged. save for the LED, this is completed.
I'll share the final result once I get that installed. (It's expected to be here in a couple of weeks)
This was actually a lot of fun to do, and I'm very much proud of the result here. I hope you all had as much fun looking at all this as I did putting it together.
Let me know what you think!
---
Edited by: The_Shadow, Sep 28th, 2025 @ 12:59 am